Providing High Quality Images
Graphics that have been scanned or captured from a digital camera are known as bitmap file (or raster) images. A bitmap is essentially a rectangular grid filled in with tiny coloured squares called pixels. These are the primary method of incorporating photography and illustration into a design.
It is necessary to make sure that your images are at a high enough resolution for the intended purpose. No matter how one tries to finesse an image, if the resolution is too low it will appear coarse or blurry when printed. To know if an image is high enough quality for printing requires an understanding of what resolution means.
Understanding Resolution
The total number of pixels in an image indicates the quality of that image. More pixels allow for more photographic detail. So, when figuring out if an image is large enough to use, we do not merely consider the physical dimensions of the image. We are also interested in the concentration of pixels within that space. This density of pixels is known as “resolution” and is measured by “pixels per inch” (or ppi). The term “dots per inch” is often used interchangeably, although this refers specifically to the printing process.
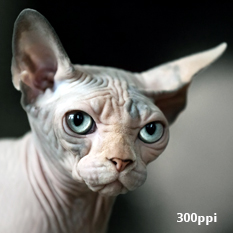
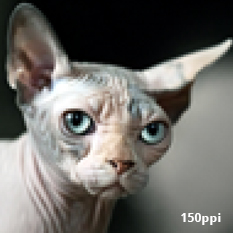

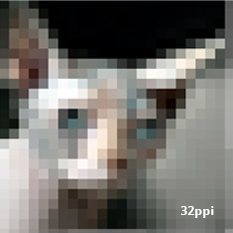
Examples of how various image resolutions will appear when printed
Tips and FAQs
To see how resolution affects image quality, observe our four kitties above. They all share the same height and width. Where they differ is that each contains a different number of pixels per inch. The one with the highest resolution is sharp and life-like. As the ppi gets progressively lower, the images lose detail and seem blockier (an effect known as pixelation).
File Size
Dimension multiplied by resolution indicates how large the file really is—the number of pixels that make up the image. Consider the values below. The first measurement represents a medium-sized picture with a low level of detail. The second one represents a small picture with a high level of detail. However, they both contain the same amount of information. One is merely set up to print larger than the other at the expense of resolution.
For offset printing, the ideal resolution for photographs is 300 ppi. For web, 72 ppi is the current standard. Advances in technology like high-resolution retina displays require 150 ppi for images displayed on a hi-res computer screen. Images that will be printed as large wall murals should be at least 80 ppi, and preferably higher (100 ppi or better). Images that will be printed as photographic art should be at least 150 ppi or better.
Note: Figuring out the resolution of an image requires the use of photo editing software. For Adobe Photoshop, look under the menu item “Image” and select “Image Size”.
Resizing an image
Resolution is a one-way street. You can easily remove detail from a picture by shrinking the image, but you cannot add detail where there is none. When you enlarge an image, the software attempts to stretch out existing pixels to make up the difference. This is known as ‘interpolation’ and results in a blurry image. The general rule is to capture an image as large as possible the first time around, and then reduce it as necessary.
Accounting for file compression
It takes a large amount of memory to store a high-resolution image, so often data compression techniques are used to reduce the file size. A popular example of this is the JPEG (.jpg) file format. These files sacrifice information, and therefore image quality, in order to achieve a smaller file size.
There are different levels of compression. JPEGs with minimal compression can be used but, once the compression becomes noticeable, the image is unprintable. Always keep this in mind when providing images to a designer; even an image with high resolution won’t make the cut if it’s badly compressed.
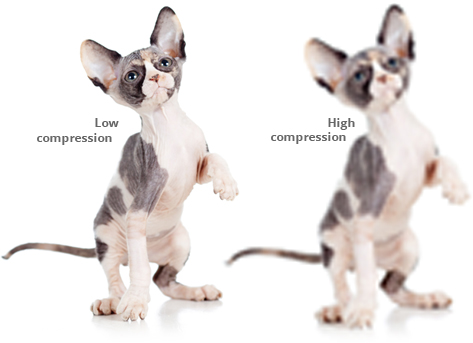
You should be able to visually confirm whether compression is a problem for any given JPEG image. Notice the example of “high compression” shown here. If the image has a blurry mottled texture, it’s obviously been damaged by compression. This effect is known as “artifacting” and should be avoided.
Also, avoid saving an image as a JPEG multiple times. Each time it is saved, compression is applied anew and artifacts can increase rapidly. Files saved in the TIFF format can use LZW, a lossless compression method. This is often a better option than JPEG for large, high quality output, particularly if gradient blends are involved.
Can I use images found on the web?
Images found on the web are normally too small and too compressed for printing purposes. Stock photography web sites and online archives dedicated to the distribution of high-resolution imagery are the exceptions. When using images off the web, make sure to consider the copyright laws.